


 Hope you're having a good start to your Friday, I'm excited to share another week of favorites!...
Showing posts with label How To Make. Show all posts
Showing posts with label How To Make. Show all posts
ATK 5 Faves
11.20.2015
Hope you're having a good start to your Friday, I'm excited to share another week of favorites!...
How to Make Something Crafty for July 4th
6.29.2015

Hello ATK readers! As
you may know, July 4th is fast approaching. For this month’s project, I wanted
to do something that would represent this holiday and reflect my birth state of
California. Since July 4th is just around the corner, what better way than to
get down and “dirty” to create something that will be close to your heart. Today,
I am creating something functional and fun. Stay tuned and hope you like it.

-Red, white, and blue
embroidery floss (found at Walmart for .33 cents each)
-11 x 16 wooden board
from Michaels (don’t forget to use the 40% off coupon)
-sponge paintbrush
(found at Michaels)
-Acrylic craft paint
(black, or any color of your choice)
-Nails
-Hammer
-Map of your a
state

{DIY TIP: I suggest cutting the map out
first and then nailing around the outside of the map, not on the paper because
it will get stuck in the nail and result in paper sticking in the holes after
nailing.}


This project will take
a couple of hours or maybe even less, so give ample time to complete it. I
hope you enjoyed this tutorial. Happy July 4th and happy crafting!
Xo, Angela
#TheATKTeam
Celebrate St. Patrick's Day with Smirnoff Cocktail Recipes
3.17.2015

Let's celebrate the color green with a couple of fun and tasty Smirnoff recipes to try...
HOW TO MAKE :: Smirnoff Campfire S'mores Shake
12.21.2013

Hosting a holiday party? Then I've got a great do-it-yourself drink for you to make! The bf (aka the chef) and I took on the challenge to create a mixed drink using Smirnoff's new Wild Honey flavored vodka. We wanted to make something festive and came up with this Smirnoff Campfire S'mores Shake. If you have 15 minutes to spare, then you can make this 4-step awesome elixir. It's simple, easy, and delicious...
How To Make: Pumpkin Spice Mini Cupcakes
10.30.2012
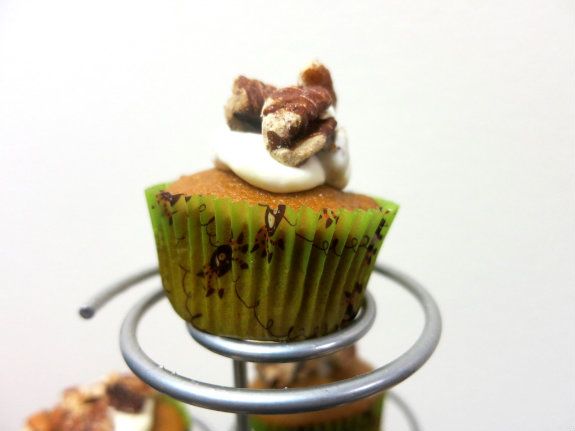
Every now and then during the holidays I feel like bringing out my crafty "domestic" side. Then, somehow, I get too busy and things fall through the crack. Well this Halloween I was more than determined to make something, no matter what. After researching online, I found a Pumpkin Spice Cake recipe that I converted into mini cupcakes. See below for the quick, easy directions to make this super deliciously moist dessert. Hey, if I can make it, so can you!
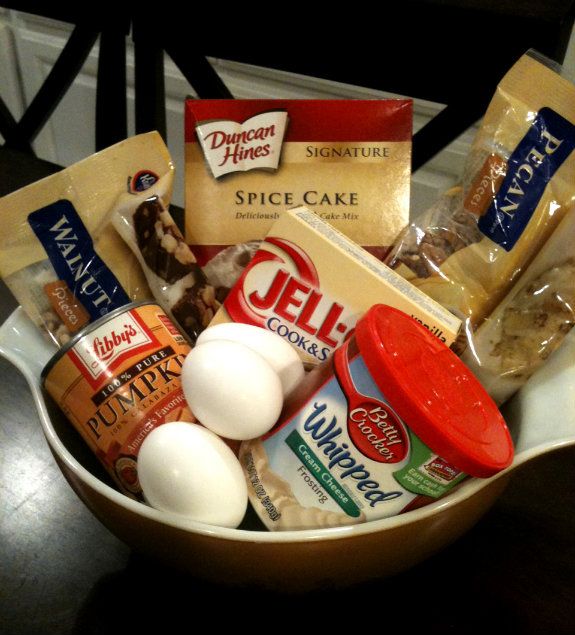
1. GATHER your ingredients: 1 package spice cake mix, 1 package (3.4oz.) JELL-O vanilla flavor instant pudding mix, 1 cup mashed cooked fresh pumpkin (I used canned fresh pumpkin), 1/2 cup oil (I used Kirkland olive oil), 1/2 cup water, 3 eggs, cream cheese frosting (I used the whipped version because I wanted it to be light), chopped pecans (& walnuts if desired)
2. HEAT oven to 350 degrees while you prep (for about 30 minutes).
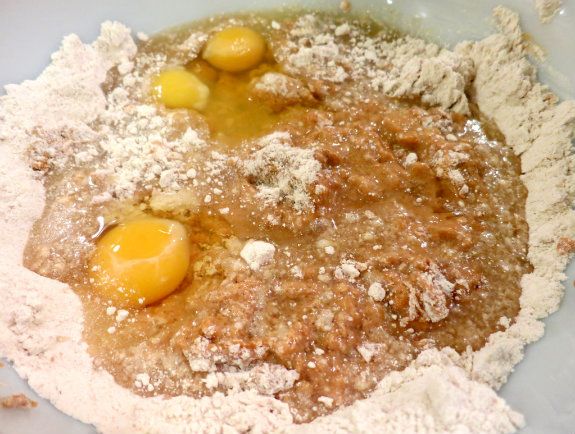
3. ADD these ingredients into a large bowl: spice cake mix (tip: I sifted it first so there wouldn't be any clumps), JELL-O vanilla pudding mix (as is in powdery form-don't make the actual pudding), cooked fresh pumpkin (tip: if you want to use it fresh then cut pumpkin into slices, wrap in plastic wrap, & put in microwave to warm up a bit) OR canned fresh pumpkin (what I used because it was just easier for me and I just eyeballed what a cup would be), oil, water, & eggs
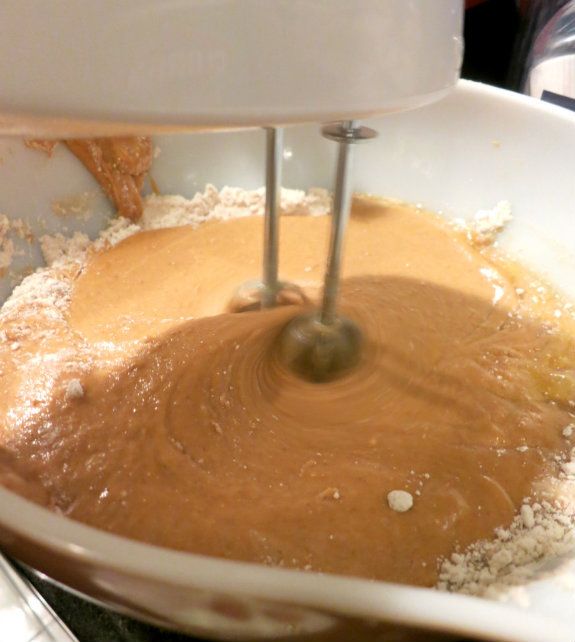
4. MIX them until well blended (tip: use a hand mixer if you have one, it's so much easier & saves you lots of time)
5. POUR blended mixture into cupcake wrapper OR pan (if you want to make a cake instead)

6. BAKE for 12-15 minutes for mini cupcakes OR 32-35 minutes for cake (tip: do the toothpick test, if you insert the toothpick in the middle & it comes out clean then it's done baking) and let cool

7. TOAST pecans for 8-10 minutes while the cupcakes/cake is baking (tip: try to time it so they'll be done around the same time)
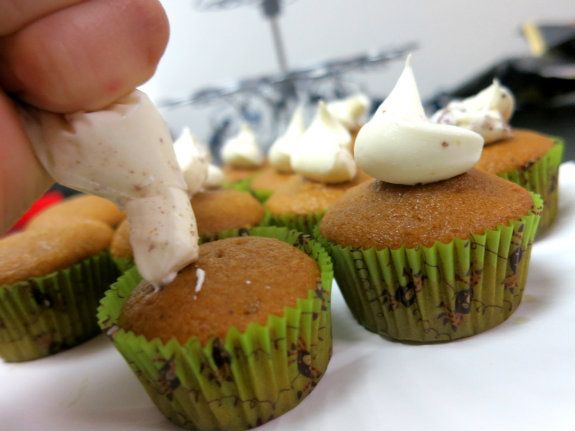
8. SPREAD cream cheese frosting (tip: get a sandwich bag, scoop some frosting in it to one of the bottom corners, cut a small diagonal line, & voila! You've got yourself a homemade frosting decorator tool at your fingertips!) on top as desired (tip: make sure the cupcake/cake has cooled by this time otherwise your frosting will just melt from the heat)
9. SPRINKLE the toasted pecans (& walnuts) on top as desired.
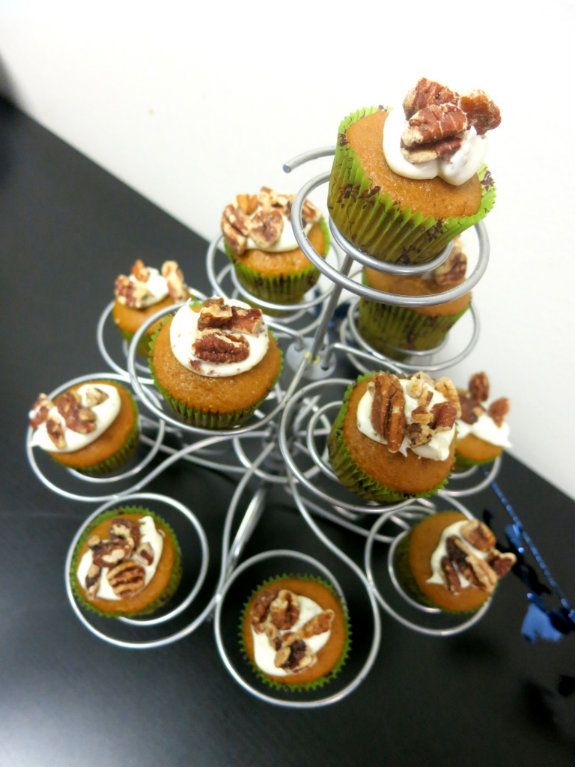
10. DISPLAY them on a nice rack and it's ready to serve!
I was using a 12 piece mini cupcake baking tray and with this mixture I almost made 100 mini cupcakes. Yup, I said almost 100! Probably around 80-90 which was more than plenty to share (little sisteroo brought some to work and so did I). Since I was baking the mini cupcakes for roughly 12-15 minutes each time, it took about 2 hours (give or take) to finish everything. I only had 1 baking tray so I highly advise in investing in at least 2 because those mini cupcakes are so tiny, it seemed like forever until I finally finished using all the mixture.
Another tip: this Pumpkin Spice recipe is also great for Thanksgiving coming up. Feel free to try it out and let me know how it goes!
Bon appetit!~!
Sending love,
kimberly
-xoxo-
Instagram/Twitter Me: @kimberly_luu
STIXIE: Essie's Breast Cancer Nail Polishes
9.26.2012
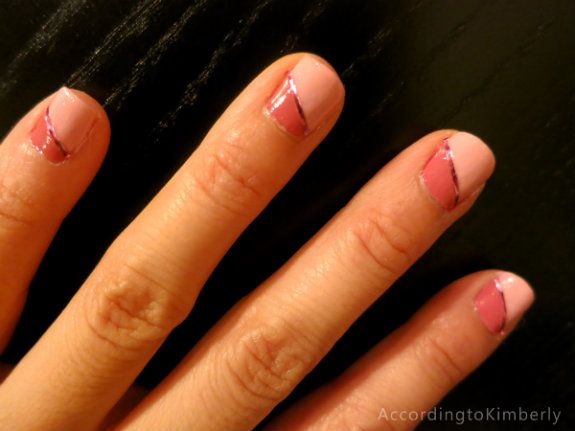
I was beyond estatic when I found out that Essie was carrying a couple PINK polishes dedicated to Breast Cancer Awareness! If you know me, then you would know that I am not a pink pink person. However, I will always make the exception and be totally pinked out when it comes to spreading breast cancer awareness.
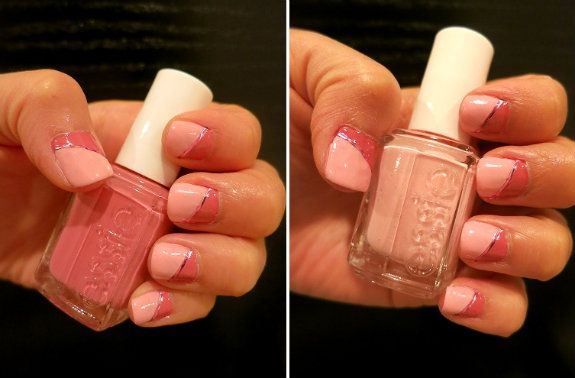
Since I was going to do the Susan G. Komen Breast Cancer Walk (pics to come), I knew I had to paint my nails with Essie's Breast Cancer Awareness polish line. It only made sense right? To make it fun, I did a two-tone diagonal design and added a strip of glitter.
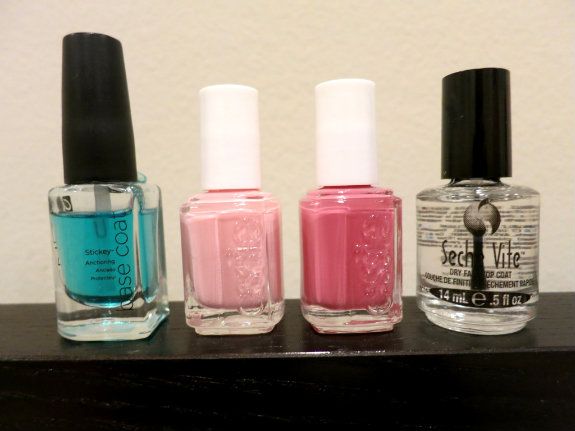
WHAT I WORE: Shellac CND base coat, Essie's Check-Up, Essie's We're In It Together, Seche Vite top coat. Aren't the Essie polish names (Check-Up & We're In It Together) so cute? Perfect little reminders to continue spreading Breast Cancer Awareness. Can't help but to love that!
***A big THANK YOU to STIXIE for introducing me to this limited edition collection! If you haven't yet, go check out all their amazing beauty products here. They have a lot of really cool stuff at affordable prices! It's definitely been one of my fav go-to spots ;)
kimberly
-xoxo-
Instagram/Twitter Me: @kimberly_luu
P.S. My nails are totally spreading Breast Cancer Awareness! Many people have been complimenting my nails so, of course, I told them all about this limited edition Essie nail polish collection. You can get it too from STIXIE here but hurry before they run out. Happy shopping guys!
How To Make a French Braid Bun
1.04.2012

Warning: unless you are a pro, you will need someone to help you with this. Preferably someone who's good at French braiding.

Step 1: Flip your head upside-down while your friend gathers your hair together. They'll want to make sure there's no knots or tangles (it won't look nice if it's noticeable).

Step 2: Have your friend start French braiding your hair from the bottom to the top of your head (wherever you plan to have your bun placed).

Step 3: When the French braid is to your desired spot, hold your hair and carefully flip your head back then tie the remaining hair into a bun.
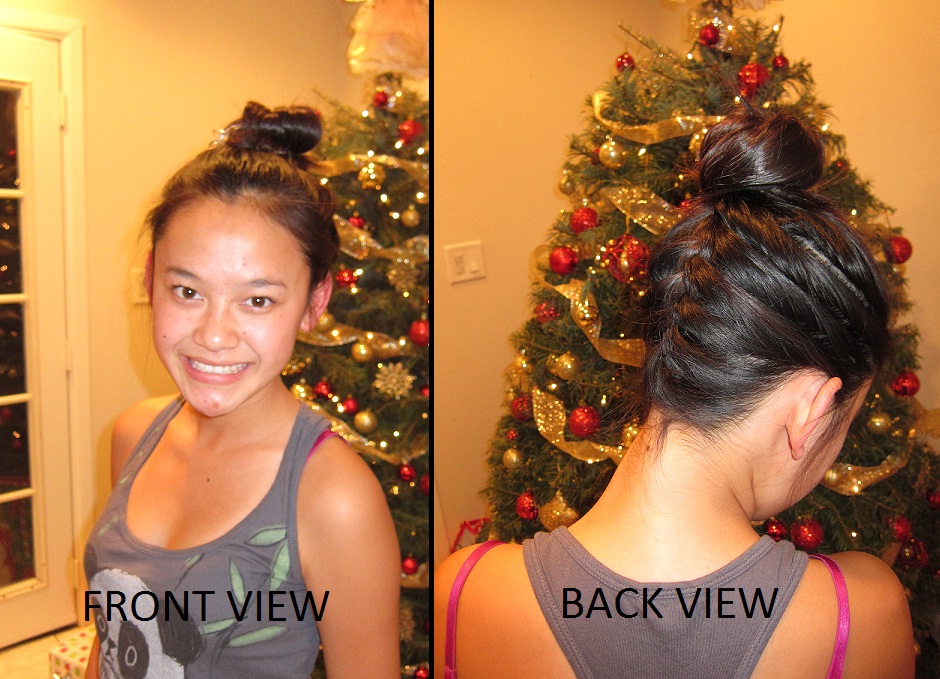
Voila! A French braid bun. Kind of reminds me of an upside-down/reverse French braid 'do, doesn't it?

Special kudos for my little sister Sus! She did the French braid bun for our little piglet. Not too shabby for her 1st try huh?
Have fun trying this new 'do!
Sending love,
kimberly
-xoxo-
Food for Fridays: How To Make Nutella Cupcakes
12.16.2011

I had my holiday work party this week and so I make nutella cupcakes. After posting a pic, some of my friends wanted to learn how to make it so I figured this would be the perfect post for this week's Food for Fridays.

Step 1: Gather all your ingredients listed on the mix box (hint: instead of water I use milk)

Step 2: Mix all ingredients together (just follow the instructions)

Step 3: Take cupcakes out of oven when ready (poke center with toothpick & it should come out smoothly), let it cool, and then cut part of the top off

Step 4: Scoop some nutella into it & then add the frosting

Then enjoy! Hope you have fun making it!
Bon appetit!~!
Sending love,
kimberly
-xoxo-
Food for Fridays: How To Make Wine Slushies
12.09.2011


Have I picture overloaded you with wine already? Well there's more! To end the week, I decided this week's Food for Fridays post should also be about wine too! It's only fitting right? To make the wine slushies (pics shown above), we used the Elysium wine from Quady Winery.
How To Make: Pour wine into a bowl, cover with plastic wrap, and put bowl in freezer. Take the bowl out of the freezer when the wine crystallizes. The wine will easily break into pretty granite -like consistency. Scoop the frozen wine into your choice of glass and garnish as you like. Voila!
This is so simple to make and requires such minimal effort. It's a great new way to drink wine and perfect for parties. Hope you like and have fun making it!
Sending love,
kimberly
-xoxo-
How To Make Sure You'll Have a Fun Night
8.05.2011

Just follow the rules:
1. Wear a cute dress that fits you just right from every camera angle (picture perfect).
2. Predrink a little bit but not too much (you don't want to get wasted).
3. Then go dance the night away (while burning calories!) with good friends.
Pretty simple right?
Sending love,
kimberly
-xoxo-
P.S. Above artwork was done by Michael Phillips who I met at the Sawdust Art Festival. The Dress-Drink-Dance art happens to be my second favorite. ;)
Food for Monday SPECIAL: How To Make Bananas Foster
7.25.2011

Okay I am a couple days late for my usual Food for Fridays post, so I decided to do something special this time: a "How To Make" post for bananas foster!
The other day I was craving this dessert and the good ole' boyfriend of mine said he could quickly make it in a couple minutes. "Seriously?" I doubted...and so he did. I am not a chef so whenever he whips something up in such a short amount of time, it always fascinates me. Lucky for me I have my own personal chef...and lucky for him, I can be his food-tester. It's a hard job but someone has to do it right? ;)
HOW TO MAKE bananas foster:
You'll need bananas, rum, and your choice of ice cream (we got all of these ingredients from Staters)

Step 1: Cut bananas into quarters (in half and then half of that)


Step 1: Cut bananas into quarters (in half and then half of that)

Step 2: Melt some butter with brown sugar and a dash of salt


Step 3: Add bananas to the mixture (this can be done after the rum is added if you like the bananas more raw)

Step 4: Pour in a shot of rum or more if you prefer (just be careful because the flame comes fast so stand back)

Step 5: Scoop out good spoonfuls of ice cream (I like a lot) into a bowl, add the bananas and drizzle sauce over it

Voila and there you have it! Pretty simple huh? I liked it so much we actually had it twice within three days! Also, you have to eat it right away because the ice cream melts FAST!
This is a great dessert to make to surprise your special someone or to treat yourself out. Have fun cooking and bon appetit!~!
Sending love,
kimberly
-xoxo-
Subscribe to:
Posts (Atom)
Template designed by Just Blog It
Designed By Baby in Heels